Homemade Apple Pie: Flaky, Buttery, and Filled with Warm Cinnamon Apples
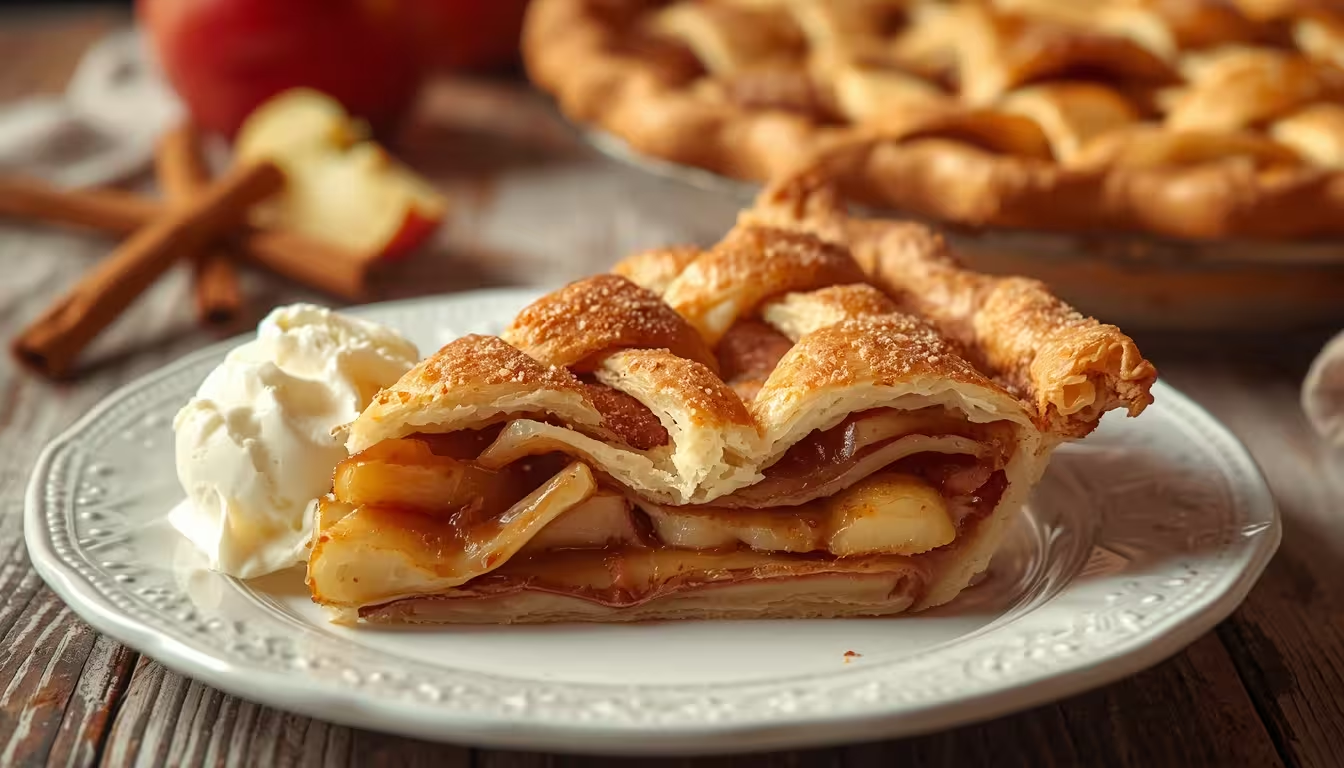
Few desserts are as comforting and timeless as a homemade apple pie. With a golden, flaky crust wrapped around tender apples coated in cinnamon, sugar, and warm spices, this classic dessert is perfect for holidays, family gatherings, or a cozy weekend treat.
The secret to a great apple pie is balancing the sweetness and acidity of the apples while keeping the filling juicy but not watery. A buttery crust adds richness and provides the perfect contrast to the soft, warmly spiced apple filling.
Whether served warm with vanilla ice cream or enjoyed on its own, this homemade apple pie delivers that classic bakery-style flavor with simple ingredients and a straightforward preparation method.
Why You’ll Love This Homemade Apple Pie
- Classic homemade flavor: Fresh apples, cinnamon, and buttery pastry create a timeless dessert.
- Flaky and buttery crust: The crust becomes golden and crisp while remaining tender inside.
- Perfectly spiced filling: Cinnamon, nutmeg, and vanilla enhance the natural flavor of the apples.
- Great for special occasions: Ideal for Thanksgiving, Christmas, birthdays, and family dinners.
- Make-ahead friendly: The pie can be prepared in advance and baked when needed.
- Easy to customize: Add nuts, caramel, or extra spices for your own variation.
What Kind of Apples Should I Use for Homemade Apple Pie?
The best apple pie usually combines apples that hold their shape during baking with apples that become soft and flavorful.
Granny Smith apples are an excellent choice because they are tart and firm. They provide a pleasant contrast to the sweet filling.
Honeycrisp apples are naturally sweet, crisp, and juicy, making them another great option.
You can also use Pink Lady, Braeburn, or Golden Delicious apples. For a more complex flavor, combine two or three varieties rather than using only one type.
Avoid apples that become extremely soft or watery during baking, as they can make the filling mushy.
Options for Substitutions
- All-purpose flour: Use pastry flour for a slightly more tender crust.
- Granulated sugar: Replace part or all of it with brown sugar for a deeper caramel-like flavor.
- Unsalted butter: Salted butter can be used; simply reduce the added salt.
- Cornstarch: Replace with an equal amount of all-purpose flour if needed to thicken the filling.
- Lemon juice: Apple cider vinegar can be used in a small amount to provide acidity.
- Nutmeg: Replace with additional cinnamon or a small amount of ground ginger.
- Pecans or walnuts: Add chopped nuts to the filling or topping for extra texture.
- Egg wash: Use milk or cream instead if you prefer not to use an egg.
Ingredients for Homemade Apple Pie
For the Pie Crust
- 2½ cups all-purpose flour
- 1 tsp salt
- 1 tbsp granulated sugar
- 1 cup unsalted butter, cold and cut into small cubes
- 6–8 tbsp ice water
For the Apple Filling
- 6–7 medium apples, peeled, cored, and thinly sliced
- ¾ cup granulated sugar
- ¼ cup packed brown sugar
- ¼ cup all-purpose flour
- 1 tbsp lemon juice
- 1½ tsp ground cinnamon
- ¼ tsp ground nutmeg
- 1 tsp vanilla extract
- ¼ tsp salt
For Finishing
- 1 large egg
- 1 tbsp water
- 1 tbsp coarse sugar, optional
- Vanilla ice cream, for serving
Preparation of Homemade Apple Pie
1. Prepare the Pie Dough
In a large bowl, combine the flour, salt, and sugar. Add the cold cubed butter and work it into the flour using a pastry cutter or your fingertips until the mixture resembles coarse crumbs with some pea-sized pieces of butter remaining.
Gradually add the ice water, one tablespoon at a time, mixing just until the dough begins to come together. Avoid adding too much water or overworking the dough.
2. Chill the Dough
Divide the dough into two equal portions and shape each into a disk. Wrap them tightly and refrigerate for at least 30–60 minutes.
Keeping the dough cold helps create a flaky crust and makes it easier to roll.
3. Prepare the Apple Filling
Place the sliced apples in a large bowl. Add the granulated sugar, brown sugar, flour, lemon juice, cinnamon, nutmeg, vanilla extract, and salt.
Toss gently until every apple slice is evenly coated.
Let the apples sit for about 10–15 minutes so the sugar and spices can begin drawing out some of their natural juices.
4. Roll Out the Bottom Crust
Lightly flour your work surface and roll one disk of dough into a circle about 12 inches in diameter.
Carefully transfer the dough to a 9-inch pie dish, gently pressing it into the bottom and sides without stretching it.
Trim any excess dough around the edges, leaving enough to create a decorative border.
5. Add the Apple Filling
Pour the prepared apple mixture into the crust. Arrange the apples into an even mound, slightly higher in the center.
If there is a large amount of liquid at the bottom of the bowl, avoid pouring all of it into the pie. Too much liquid can make the bottom crust soggy.
6. Add the Top Crust
Roll out the second dough disk and place it over the apples.
You can leave it whole and cut several vents in the top, or cut the dough into strips and create a lattice crust.
Press the edges of the top and bottom crusts together, then crimp them with your fingers or a fork.
7. Apply the Egg Wash
Whisk the egg with one tablespoon of water.
Brush the egg wash lightly over the top crust. If desired, sprinkle coarse sugar over the surface for extra crunch and a beautiful golden finish.
If using a full top crust, make sure there are several vents to allow steam to escape.
8. Bake the Apple Pie
Preheat the oven to 425°F (220°C).
Place the pie on a baking sheet to catch any bubbling filling. Bake at 425°F for about 20 minutes.
Reduce the oven temperature to 375°F (190°C) and continue baking for another 35–45 minutes, or until the crust is deeply golden and the filling is visibly bubbling through the vents.
If the crust begins browning too quickly, loosely cover the edges with aluminum foil.
9. Cool Before Serving
Remove the pie from the oven and let it cool for at least 2–3 hours before slicing.
This resting period allows the filling to thicken and set. Cutting the pie too early can cause the filling to run.
Serve warm or at room temperature with vanilla ice cream, whipped cream, or caramel sauce.
How Long to Prepare Homemade Apple Pie?
- Preparation Time: 30–40 minutes
- Dough Chilling Time: 30–60 minutes
- Baking Time: 55–65 minutes
- Cooling Time: 2–3 hours
- Total Time: Approximately 4–5 hours, including chilling and cooling
The active preparation time is relatively short, but the dough needs time to chill, and the baked pie needs to cool properly before slicing.
Tips for Perfecting Homemade Apple Pie
Keep the Butter Cold
Cold butter is one of the keys to flaky pastry. If the butter becomes soft while preparing the dough, refrigerate the dough before continuing.
Don’t Overwork the Dough
Mix the dough only until it comes together. Overworking it can develop too much gluten, resulting in a tough crust.
Slice the Apples Evenly
Try to cut the apples into similarly sized slices, so they cook at approximately the same rate.
Use a Combination of Apples
Combining tart and sweet apples creates a more balanced and interesting filling.
Don’t Skip the Resting Time
Allow the finished pie to cool for several hours. This gives the juices time to thicken and prevents the filling from spilling out when sliced.
Bake Until the Filling Bubbles
A golden crust alone does not necessarily mean the filling is ready. Look for bubbling juices through the vents in the crust.
Protect the Crust
If the edges become golden before the center is finished, cover the edges loosely with foil and continue baking.
Watch Out for These Mistakes While Making Apple Pie
Using Warm Butter
Warm butter can blend into the flour instead of creating distinct layers. Always start with cold butter.
Adding Too Much Water
Excess water can make the dough sticky and tough. Add only enough water for the dough to hold together.
Overloading the Pie
A very large mound of apples can make the pie difficult to bake evenly and may cause excessive liquid to overflow.
Skipping the Thickener
Flour in the filling helps absorb some of the apple juices and gives the finished pie a thicker consistency.
Cutting the Pie Immediately
A freshly baked apple pie needs time to set. Cutting it while piping hot can result in a loose, runny filling.
Baking at One Temperature the Entire Time
Starting at a higher temperature helps the crust develop color and structure, while the lower temperature allows the apples to cook without burning the crust.
What to Serve With Homemade Apple Pie?
Vanilla Ice Cream
Warm apple pie topped with cold vanilla ice cream is a classic combination. The ice cream melts slightly over the warm filling, creating a rich and creamy contrast.
Whipped Cream
A spoonful of lightly sweetened whipped cream adds a soft, airy texture without overpowering the apples.
Caramel Sauce
Drizzle warm caramel sauce over each slice for a richer, sweeter dessert.
Coffee
Apple pie pairs wonderfully with hot coffee, especially after a family dinner or during an afternoon gathering.
Tea
Black tea, chai, or cinnamon tea complements the warm spices in the pie.
Storage Instructions
At Room Temperature
Once cooled, homemade apple pie can be kept covered at room temperature for about 2 days.
In the Refrigerator
For longer storage, refrigerate the pie in an airtight container or tightly cover it with plastic wrap or foil. It will generally keep for about 4–5 days.
Freezing
You can freeze a fully baked and cooled apple pie for up to 3 months. Wrap it tightly in plastic wrap followed by aluminum foil.
Thaw it in the refrigerator and reheat in a 350°F (175°C) oven until warmed through.
You can also freeze an assembled, unbaked pie. Bake it directly from frozen, adding extra baking time as needed.
Estimated Nutrition
Approximate values per serving, assuming 8 servings:
- Calories: 420 kcal
- Protein: 4 g
- Carbohydrates: 60 g
- Fat: 19 g
- Saturated Fat: 11 g
- Fiber: 4 g
- Sugar: 30 g
- Sodium: 300 mg
Nutrition will vary depending on the apples, crust thickness, sugar, and serving size.
Frequently Asked Questions
Can I make homemade apple pie ahead of time?
Yes. Apple pie is excellent for make-ahead preparation. You can bake it a day in advance and store it covered until ready to serve.
Why is my apple pie filling watery?
Watery filling can result from using very juicy apples, adding too much liquid, insufficient thickener, or cutting the pie before it has cooled.
Should I peel apples for apple pie?
Peeling is recommended for a smoother, more tender filling. However, you can leave the skins on if you prefer a more rustic texture.
Can I use only Granny Smith apples?
Absolutely. Granny Smith apples create a tart, flavorful pie. If you prefer a sweeter filling, combine them with a naturally sweet variety such as Honeycrisp.
How do I prevent a soggy bottom crust?
Keep the dough cold, avoid adding excessive liquid from the apple mixture, and bake the pie thoroughly until the filling is bubbling.
Can I make apple pie without a lattice crust?
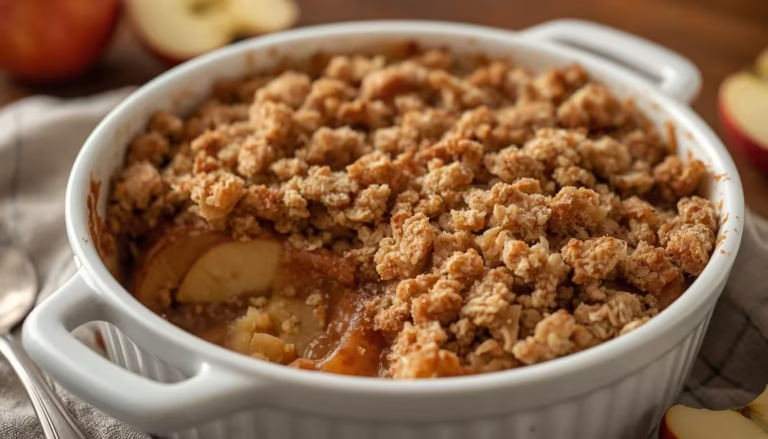
Yes. A solid top crust with several decorative vents works perfectly well. You can also use a crumble topping for a different style of apple pie.
How do I reheat apple pie?
Place individual slices in the microwave for a quick option, or reheat the whole pie in a 325–350°F oven until warm.
Can I freeze apple pie?
Yes. Both baked and unbaked apple pies can be frozen. Wrap them tightly to prevent freezer burn and use them within about three months for the best quality.
Conclusion
Homemade apple pie is a classic dessert that combines a crisp, buttery crust with tender apples and warm cinnamon-spiced filling. With the right apples, cold butter, and enough cooling time, you can create a pie with a flaky crust and beautifully thick filling every time.
This recipe is perfect for holidays, Sunday dinners, celebrations, or simply when you’re craving a comforting homemade dessert. Serve it warm with vanilla ice cream or enjoy it on its own for a traditional treat that never goes out of style.